CODAS Desktop – Load Manager
- CODAS Load Manager is used for scheduling orders for delivery. The Load Manager can be configured in a number of different ways to best mirror the scheduling practices of the organisation.
- If more than one individual is involved in the process then each scheduler can have their own ‘Load Plan’, this will be configured such that the scheduler can see orders for the depots that they schedule and access to the vehicles available to them for that purpose.
- More than one scheduler can see the same vehicles and loads etc. if required.
- A scheduler may have more than one plan for different uses.
- Access to the Load Manager tools is via the Load Manager icon on the CODAS Desktop.
Section Contents:
Create a Load Plan
Viewing outstanding orders & Potting Pane
Creating a Load
Add / remove Orders from loads
Load Documentation

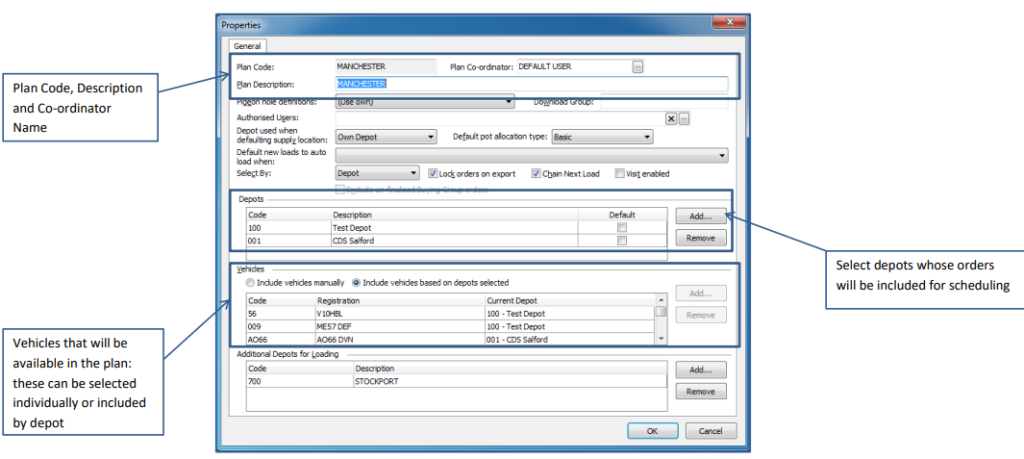
Creating a Load Plan – Select File/Properties:

Managing outstanding order pool
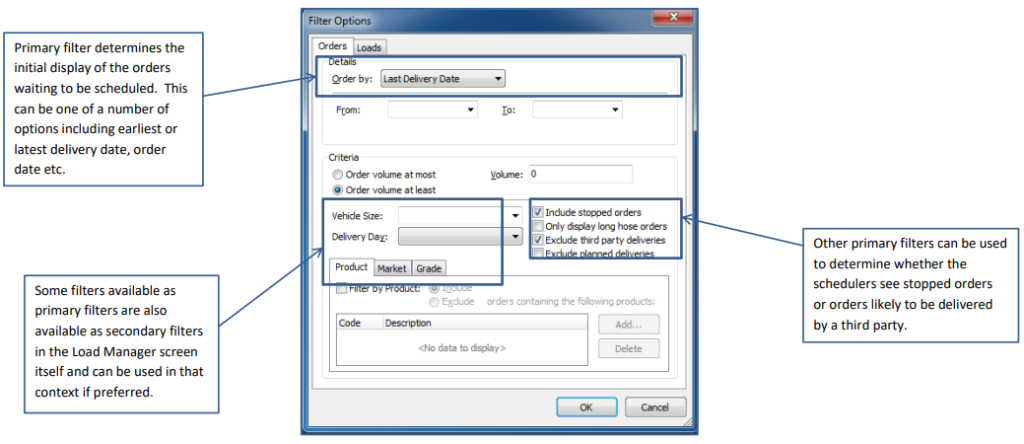
Within each plan CODAS uses a combination of primary and secondary filters to enable the planner to manage the outstanding order pool of unscheduled orders waiting scheduling. The primary filter determines what you see when Load Manager is first displayed

The Load Manager Layout is divided into sections; the top section displays the outstanding order pool and the primary and secondary filters, the bottom section displays the loads as they are created. A potting pane display is available to show a pictorial representation of the loads.

The Load Manager Layout is divided into sections,
the top section displays the outstanding order pool and the primary and secondary filters:

The bottom section displays the loads as they are created:

Load Plan display including potting pane display:

Creating a Load:
From the ‘dates’ field in the bottom left panel, right click and select ‘New Load’. Enter
the load details as below

Adding/removing orders from loads:
Add orders
- Once loads have been created for the day to be scheduled, orders can be added by clicking and dragging individual orders or multiple selections of orders from the top section of the screen to the loads available in the bottom section.
- Multiple orders can be selected by highlighting the required orders using either CTRL-click or SHIFT-click options.
- The primary and secondary filters in the top section are intended to be used to focus the display to the orders that need to be scheduled onto the loads currently in progress.

Remove Orders
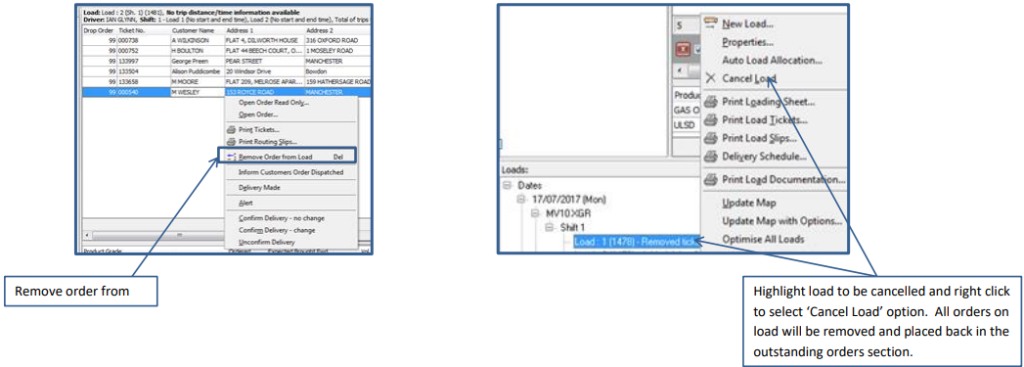
- Orders can be removed from loads by selecting the order on the load, right clicking the mouse and selecting ‘Remove Order from Load’.
- Orders can be moved between loads using the ‘Click and Drag’ process.
- The process of cancelling a load using the right click menu option ‘Cancel Load’ will automatically remove all orders on that load and put them back into the outstanding order list to be rescheduled.

- Load Documentation:
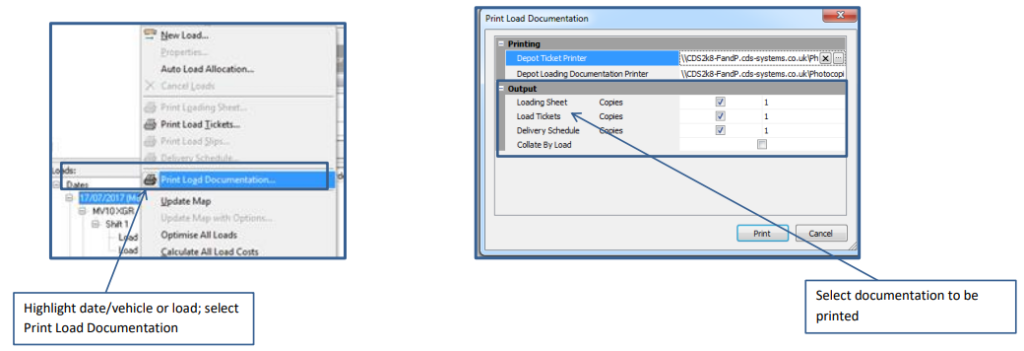
- Once loads for a day have been completed the documentation for the load can be printed for loads by day, vehicle or individual loads.
- The documentation available is: Delivery Tickets, Loading Sheet; Delivery Schedule, the user can select or deselect these options using the tick boxes displayed.
- Right click on the date, vehicle or load. Select ‘Print Load Documentation’. Choose which options are required.
