Introduction
This article describes the set up of Direct Debits as a means by which your Customers can pay you. It concentrates on the work required to set up a Direct Debit Instruction on a Customer’s account, and assumes that CODAS is administratively configured already, and you have the appropriate licences applied to a User.
Setting up Direct Debits in the Customer Record
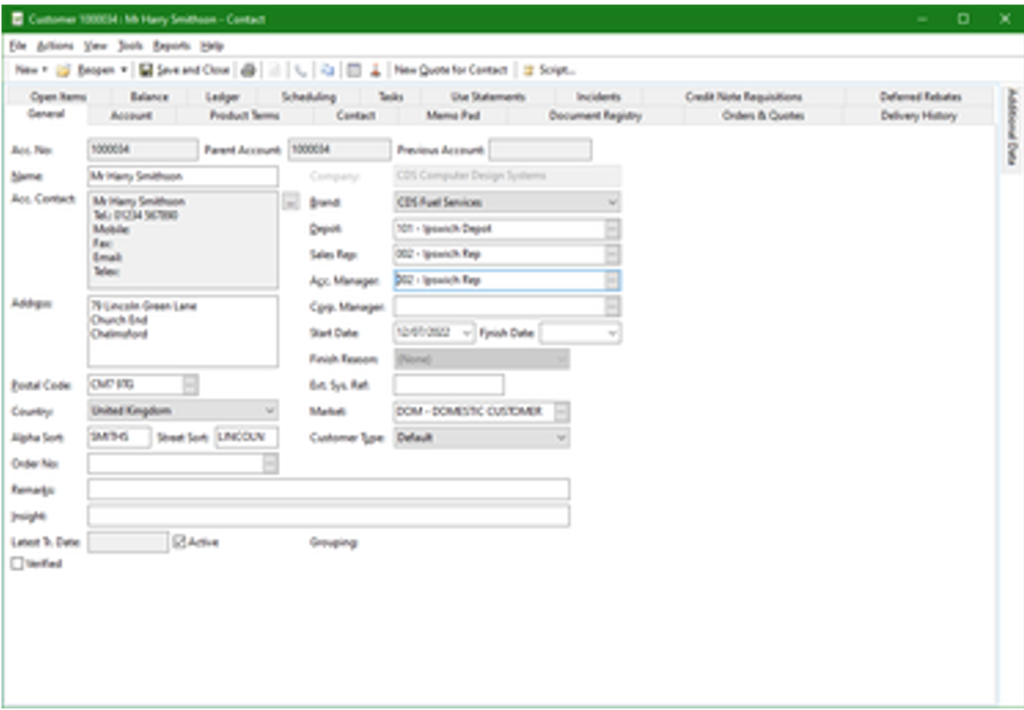
Select a Customer from your database and open the Customer Record window, which looks like this :

- Direct Debits can only be created on a Parent account, and not on Child accounts.
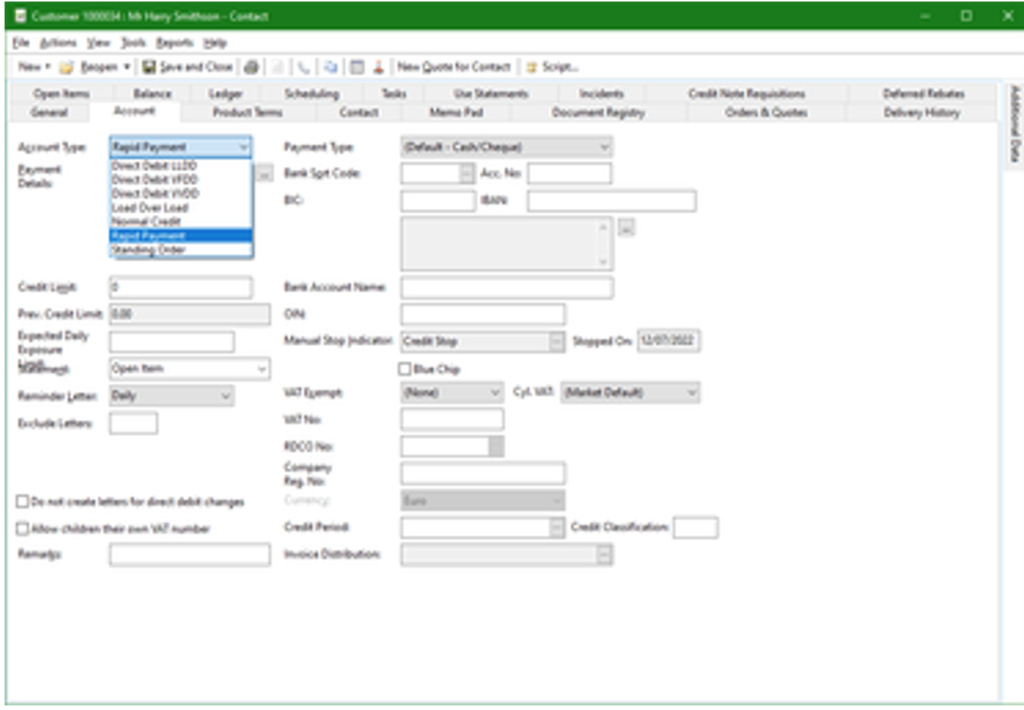
Select the “Account” tab:

Account Type Field
This field shows the type of account. For the sake of demonstration, the Account should be either Normal Credit or Rapid Payment (Cash on Delivery). You will be given a list of options for Account Type, and we will only look at the Direct Debit types.
- Direct Debit FFDD Fixed Amount Fixed Day (the same amount will be drawn on the same day each month and would normally be used for Budget Scheme customers).
- Direct Debit VFDD Variable Amount Fixed Day (a variable amount will be drawn each month, on the same day).
- Direct Debit VVDD Variable Amount Variable Day (a variable amount will be drawn on various days of the month).
In this example, select Direct Debit FFDD.
The Direct Debit window opens as follows :

The section labelled Type of Direct Debit is already showing the selection, and no change needs to be made now. Enter the appropriate details from the Direct Debit mandate returned by the customer/given by the customer, as below
| FIELD NAME | DESCRIPTION *NOTE : A number in brackets (e.g. [20]) indicates the maximum field length. |
| Sort Code | Bank sort code – normally in form of nn-nn-nn [8] [Mandatory] |
| Bank Account Number | Bank account number – normally numbers – if the number is less than 8 characters, prefix the number with zeros to make up to 8 (e.g. 00123456) [8] [Mandatory] |
| Name of Account Holder | The exact name of the account holder – (Capital Letters/Numbers/& – only) [18] [Mandatory] |
| Debit Day | Day of the month when the Bank will make the payment. If “31” is entered, Codas will use the last day of any month with less than 31 days. Any day can be entered, unless restricted by the Administrator [2] [Mandatory] |
| Payment Amount | Amount of payment in numbers (e.g. 200.00) [Mandatory] |
| Date of First Debit | Use the down arrow to open the calendar and select the date. This is at least the Debit Day in the next, or next but one, month from now, to allow time for the DDI to be set up, and the payment to be requested. [Mandatory] |
| DDI Reference | This defaults to the Account Number of the Customer, but should be the same as the reference on the DDI Mandate completed by the Customer (if appropriate). It must also be unique. [Mandatory] |
| OIN/BACS User No | Originator’s Identification Number as given to you by the Bank. There may be several set up on CODAS to cover different agreements. If there is, then use the down arrow to open the list of OIN for selection. If a number is already in the field surrounded by angled brackets (e.g. <123456>), then this is the system default and if no other numbers are in the list, then this may be used. If the list shows no numbers. The number cannot be entered here. [Mandatory] |
The remaining fields are either information fields, or optional fields that can be completed if you wish for reporting and future reference. Complete as required, and then double check the information.
Click the “Apply” button to enter the details and be returned to the Account Details tab of the Customer Record. When the “Apply” button is clicked if any of the fields have been incorrectly entered, CODAS will show an error message which will allow you to correct the information before creating the instruction. If you have Modulus Checking set up in CODAS then the system will check that the Sort Code and Account Number are applicable to each other.
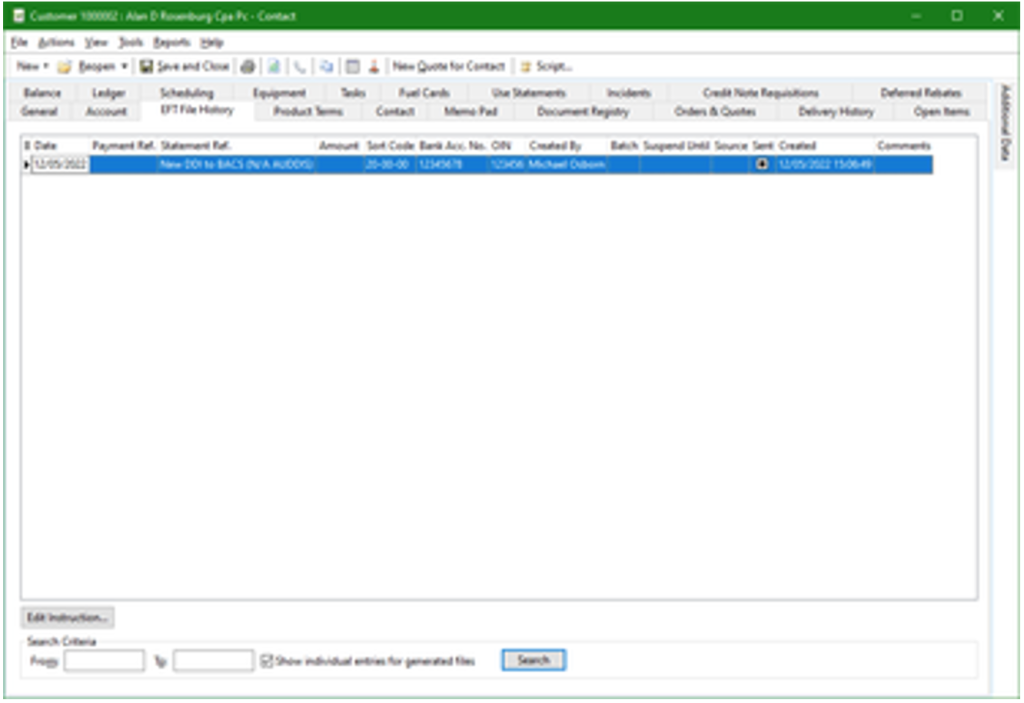
In the Account Details tab of the Customer Record window, the relevant fields will have been updated by CODAS and are now Read-Only. A new tab called EFT File History now appears in the tabs shown in the Customer Record window. Select this tab and you will see a list of updates, changes and transactions for a Customer’s DD history.

If a change to the Direct Debit Instruction becomes necessary, click the button labelled “Edit Direct Debit” in the lower left of this window. This will open the Direct Debit window and allow you to make any changes required. The field labelled “Date of Last Change” is now entered by Codas and shows the date on which the Direct Debit details were entered. This will update when any changes are made to the instruction.
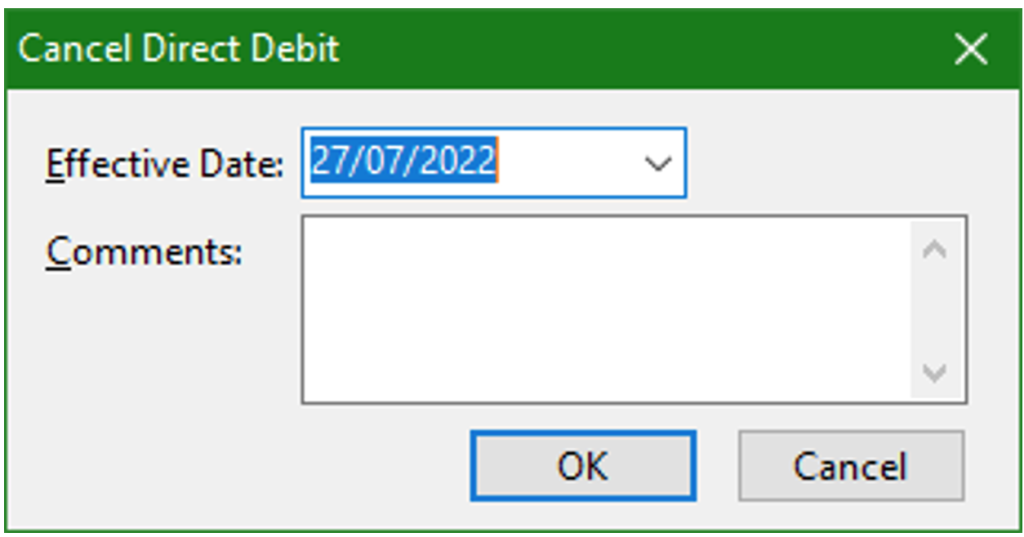
A new button labelled “Cancel EFT” now appears in the Direct Debit window. Select this button and a confirmation is requested as follows :

The Effective Date defaults to today, but you may use the down arrow to open the Calendar and select the date on which the Direct Debit is to be cancelled. Do NOT change the date. Click the Cancel button to close this window and be returned to the Direct Debit window.
Other items to consider
- If you use Credit Charges or Discounts you may need to ensure these are updated on customer accounts to ensure they are only charged appropriately.
- VV and VF Direct Debits rely on the due date of the invoice being correct. You should ensure that terms are set up correctly on the customer account to make sure invoices are drawn at the right time.
- If you intend emailing DD Payment Advices or Statements then make sure that the contact is set up to receive them.
- Ensure that the Reminder Letter flag is set appropriately for VVDD and VFDD (most probably to “No” as they will probably not want to have statements sent out (These can be Mass Amended if required).
- Ensure that the Statement Type flag is set appropriately. While it can be overridden when doing bulk mailings, doing manual statements is easier if the default is set correctly (These can be Mass Amended if required).